“Rebooting is a wonder drug - it fixes almost everything” ~Garrett Hazel
Minecraft is a game that was released in 2009. And ever since multiplayer was added, people have gathered with others to create servers to play together. And with that would come amazing builds, fun storylines, and some friendly mischief.
I was always interested since I was younger with hosting a Minecraft server myself. Part of it was to play with friends, the other reason was that I was broke. But in setting it up for the first time, I was introduced to the world of IT. I would sit downstairs with my Dad, and work on figuring out what setting in the router we needed to change, what configuration files needed to be configured; and this was fun to me! Ever since then, I have loved IT, and also Minecraft.
So, naturally, I do host a server now! The server is called “Lorecraft” – a Minecraft server for students & alumni from Christian Universities to play together. And it is the biggest server that I have ever “administrated”, with a diverse group of individuals and setups!
I started the server with a friend of mine from my childhood. He went to a different university than I did, which made us thought it would be cool to create a joint university server. This then lead to us opening it up to everyone that has gone/is enrolled in a university, and their friends. With this idea and a name, we decided to march forward with getting the server made.
To begin with, we had a name, and now we needed to secure that domain name as soon as possible. So we went off to namecheap.com, and started to look around. We noticed that the domain for lorecraft.cc wasn’t taken yet, and it was pretty cheap, so we purchased that domain, and moved into the configuration page. Since we didn’t have anything actually set up yet for the domain to point to, we just pointed it to my personal website (the one you’re reading now), and just let it sit there until we had something to point it to.
When we were creating the server, we thought about hosting it at my house for a while. However, this would present security and availability concerns. What if my home network went out? What if the power in Nashville went out? What if I moved, how long would it take for me to unpack the computer and set it up again? Due to these questions, we decided that we were going to host the website on Apex Server Hosting. There were a couple key factors in this decision.
- The interface allowed for easily setting up plugins, and automatically downloading them. This made it easier down the road to add plugins and configure them.
- Apex allows for direct FTP through the console. I know this might sound weird as a requirement, however it was very important to me that I could still get in when I needed to and configure specific parts of the server. This became needed even more when it came to configuring some more technical plugins like Geyser.
- They had a support team. This was really important, as if something were to happen, we needed a knowledgable support team that could actually take care of our issue.
Now that we had the server location, we could really get to work configuring items. For myself, this included diving into the world of Geyser. When we had started talking initially, we found out that we both currently ran servers for our respective colleges already, but there was one key difference between them: mine ran java, and his ran bedrock. This is an issue because, normally, you cannot play on a bedrock server with java, and vice versa. To keep the players that we already had to help it expand, we had to find a way to keep both player bases happy, and not make them switch platforms.
Geyser is a very techincal plugin, that along with Floodgate, allows players from Bedrock versions to connect to Java servers. It opens a second port, that allows players to connect over that port, go through Floodgate, and get put in Geyser where everything is translated. Getting all the configuration items sorted took some time, but once it actually was running, we were then ready to test the server.
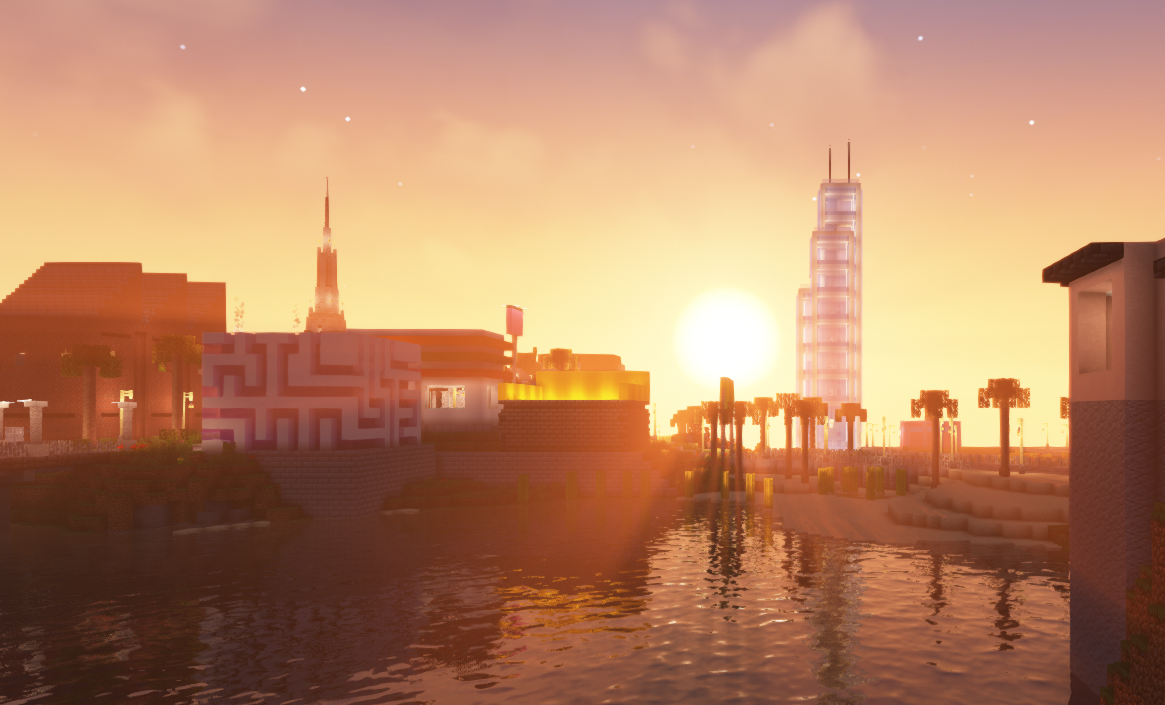
Now that we had the actual java server set up, it was time to configure the world and game settings for Minecraft. When we were starting out, we decided to go mostly with defaults for the game rules. We enabled some different server config changes, like enabling the whitelist and disabling some other items. But for the most part, it was the base settings. The change, was the map. While I was working to configure the server for bedrock & java players, my friend was working to create an amazing spawn. He ended up creating a crashed ship at the bottom of the ocean, and then when you go to walk out you are given a boat so you can go to any part of the world.
Once we loaded that world and tested it, everything was configured and ready! We linked the domains to the proper ports and such, but left the server down until the first of January for a launch day event. And when we went live, there were no issues! Everything worked as intended, and we had a blast playing. Although we did some tweaks to things like permissions and such, it has stayed the same amazing server since then.
If you have been wanting to play a survival multiplayer server (and you’ve been to a christian college), I highly recommend that you join! We have a map that’s available to view online, and with it you can do a 3d view and see all the things that the amazing players have built! If you would like to join, I recommend joining the discord. There you can learn more about the world we’ve created, with governments and a way for the palyers to influence the direction of the server.
I hope you’ve enjoyed reading how we built the server! If you’re interested in learning more about this server, maybe I’ll do some more pieces on the different parts of the server. Feel free to reach out and let me know your thoughts!